My photo
I love food. I love cooking. I love sharing food. It's the one gift you can give someone that they take inside of themselves and forever becomes a part of them. Food is more than fuel. It's a feeling, a memory, a cure, a gift, a toy..... My recipes aren't exact. There's room for substitutions, discovery, experimentation and play. Anything can be healthy with a few tweaks, or comforting with a few more. Many of my recipies are veggie friendly with just the omittance of meat, never lacking in flavour. The sky is the limit -Variety is the spice of life!

Tuesday, January 31, 2012

Basic roasted cornish hen


This rub will make your bird have it all: color, flavor, and crispy skin. It works wonders on a hen or whole chicken. The below rub should be enough for 3 hens, or one whole fryer chicken. If baking a fryer, add 15 minutes to the baking time.

Preheat your oven to 375, then combine:
  • 1/8 cup kosher salt
  • 4 tablespoons granulated garlic
  • 1-2 teaspoons cayenne
  • 2 tablespoons oregano, herbs de province, or thyme
  • A healthy dose of cracked black pepper
  • 3 teaspoons paprika (for a smokey flavor, try Spanish paprika)
  • 1 teaspoon turmeric

    (One disclaimer...most of my measurements, except for the salt, are "heaping". Aka, I tend to eyeball!)

Prep your bird (remove giblets if there are any, and gently rinse in cold water). Then dry the bird really well with paper towels. This step can be done the night prior, and here's a little trick: if you dry your bird the night before, leave it on a tray in the fridge un-covered. This allows the skin to dry out even more, and when cooked....it turns into chicken/hen skin crack. It's irresistible.

Once your bird is dry and ready to cook, simply rub a generous amount of olive oil on and inside your poultry, then follow with the rub. Be generous. Rub as much as possible both inside the bird and out - sprinkling the rub on places that are harder to rub (like armpits). Ensuring the inside has a healthy coat ensures the favors will permeate from inside.

Place your poultry breast-side up, and bake for 45 minutes - then remove. Let them rest for 5 minutes with a watchful eye. (Someone will try to steal some skin!)

This resting period will allow the juices to redistribute - and oh man, when you cut into this bird, you will notice the meat will want to fall off the bone. Be careful...when I say juicy, I mean it!

Enjoy!

Blood orange vinaigrette

This dressing gets it's sweetness from balsamic vinegar and juice from a blood orange. No sugar needed! It gains an amazing creaminess when shaken and emulsified with a good organic olive oil. It's super simple, easy, oh so yummy, and healthy!

It goes well over any salad, can be used as a marinade, and tastes great as an acid component for sautéed braising greens, like chard or kale. No blood orange? You can use any citrus - grapefruit, lemon, or orange would be a welcome guest to this party. You can even sub out the purple onion for garlic or shallots, or the tarragon for thyme or oregano. It's a playground in a jar!
Grab a jar, and pour in:
  • 1/2 cup olive oil
  • 1/2 cup balsamic vinegar
  • Juice from 1 blood orange
  • 3 tablespoons finely diced purple onion
  • Three pinches tarragon
  • Two pinches kosher salt
  • A couple pinches of ground black pepper
  • If you like, a little ground mustard really gets it creamy. But, I get lynched for mustard...this is a please all recipe

Shake. Done! Yum.....
PS. Try this drizzled on any protein and broiled. Eggs, steak...yum. Even good on bread for panini. It's multi purpose!

Saturday, January 21, 2012

Cooking School: Washing & storing vegetables


Session 2 in The Fundamental Techniques of Classic Cuisine covers basic techniques for washing and cutting vegetables. I will throw in my two cents on storage as well. Let's get to it!

Friday, January 20, 2012

Food for thought: Cooking mushrooms and imparting flavor

There's one basic rule that applies to cooking - no matter your background, style, or cuisine type. Seize the opportunity to impart flavor whenever possible. Roasting or using braising liquids (instead of straight up oils), deglazing your pan with wine, searing on high heat - all essential in adding flavor.

But there's one enemy of flavor that goes overlooked: water. Can you guess what delicious ground nugget is mostly water and largely incorrectly cooked? The beloved earthly mushroom.

It's a simple remedy - just give them room to do their thing. When spaced in a single layer in your pan, and seared on medium (then sautéed - if youre like me and like to play); they caramelize and turn into Magic Mushrooms.

If you have a dish that calls for onions and mushrooms sautéed together, treat your mushrooms like the star they are, and give them their own dressing room. If they are crowded with other performers in your dish, they tend to pout and not remember their lines.

Set them aside, then let them "bow" in at the finishing act. They will give you a much better performance, worthy of an encore.

Finishing shot: Chorizo stroganoff stuffed tomato with vinegared green beans and basil potatoes


Vinegared bacon green beans with chorizo stroganoff stuffed tomato and steamed fingerling potatoes sautéed with butter and basil.

Vinegared bacon green beans with shallots


Bacon is a ray of salty meaty sunshine that has the ability to brighten even the
ho-hummiest of dishes. Everything is better with it.
Having a bad day? Have some bacon. Eggs lonely? Bacon will keep them company. Shrimp a little self conscious about being naked? Make them a bacon outfit, and watch them work it.

Vinegared bacon green beans are another perfect example of that symbiotic relationship - and it hits all the right notes: salty, savory, with an acidic bite, a touch of sweet from the shallot, and....bacon from the bacon. But it's actually the little hit of vinegar that really makes this dish sing in the mouth.


Let's get our bacon fix:
  • 1 pound of fresh green beans, ends trimmed (I opt for organic locally grown green beans from Full Circle Farms, the flavor and health benefits alone make it worth it to go organic!)
  • 5 - 6 thick slices of bacon, diced in large chunks
  • 3 shallots roughly chopped
  • 1/4 cup of stock
  • Red wine vinegar
  • Butter
  • Salt and pepper
Making some magic: Sauté your bacon pieces until almost done, and set aside, leaving the rendered fat in the pan. (Hey, I saw you sneak a few pieces...just leave some for the dish.) Sauté the shallots and green beans in the bacon fat until the shallots start to caramelize. Add butter if your pan needs a bit of motivation.
Then add the bacon and the stock. Continue to sauté til the stock has reduced out, and the beans are tender but still have a good texture. Then hit the pan (deglaze) with a few healthy drizzles of red wine vinegar. Give everything a few minutes to come to their happy place.
Taste, salt and pepper accordingly, and be ready to smack some hands away from the pan...you will have some lurkers! As soon as you turn your back to get the plates...

The bacon and beans will take on this wonderful hint of vinegar that makes the bacon taste like "bacon crack". "Why is this bacon so good!?" They will exclaim...almost in disbelief. (It does boggle the mind. How can bacon taste better than....bacon?)

Just smile, and say: "Because I cooked it".

Let's keep the real secret between us.

Enjoy!


Wednesday, January 18, 2012

Roasted chorizo stroganoff stuffed tomato and pepper

This meal is the perfect example of a meal that was saved by improvisation. There's lots of room for play - especially if halfway through making this you find you are missing an ingredient or two....

(In my case, someone ate my ingredients!)

So what started out as a cream sauce, turned into a stroganoff, and was thus dubbed a happy accident.

To have your own happy accident, you will need:
  • 3 large tomatoes
  • 3 large bell peppers
  • 1 pound of chorizo
  • 1 bunch chard (or other hearty green) chopped
  • 4 cloves garlic minced
  • Half a purple onion diced
  • 2 tbs fresh rosemary chopped
  • 2 tbs of oregano
  • 2 tbs rough chopped cilantro
  • 1 egg
  • 1/2 cup sour cream
  • 1/2 cup of cheese (or more!) that tickles your fancy. (aka whatever cheese you have on hand that hadn't mysteriously disappeared prior deciding to make this dish)
  • A sprinkling of granulated garlic
  • Salt and pepper

To make the tomato and peppers: After you wash these guys, we are going to want to hallow them out.

The tomato will need its top sliced off, and then a knife ran along the inside.

Then use a spoon to scoop out the flesh and seeds. (Throw the scraps into your freezer bag to make homemade stock!)

The pepper will need a little help standing upright - simply slice the bottom to make a flat surface, trying not to expose holes. If you do - ah well. I did too. The filling is sturdy enough to stay put. Slice off the top, and gently carve the seeds from the inside. The peppers should be as tall as the tomato - so you will be chopping off quite a bit of the top. Reserve the tops and ends, dice them, and set them aside to be sautéed into the filling.

Assemble the tomatos and peppers in a baking dish and drizzle them with olive oil, salt and pepper and granulated garlic.

To make the filling: Sauté your onion, diced pepper, and garlic until they begin to caramelize, then add the chorizo and herbs. once the chorizo is cooked and giving off some juices, add the chard and sauté til it is wilted and tender.

Set this aside in a bowl to cool, and preheat your oven to 400. Once the filling has settled down a bit, (try NOT to taste it...I dare you) add some of the cheese (reserve some for the top), cilantro and sour cream. The cream will help to cool the mixture more. Taste (if you haven't already) and add seasoning if needed, then stir in your egg. Fill the tomatoes and pepper, top with the rest of the cheese, and cover the baking vessel with foil. Bake them for 20 minutes or so (tomato skin will split), remove the foil, and bake 10 minutes more.


These savory vessels of chorizo stuffed love are delicious, surprisingly light and satisfying. For a vegetarian option, sub out the chorizo for soyrizo, an awesome vegetarian meat-free option that even this meat lover enjoys!

Happy eating!

Saturday, January 14, 2012

Roasted green pepper pork chili


It just started snowing here in Washington...which is an exciting moment. It doesn't happen but once a year.....

It's the perfect time to lock ourselves indoors, make chili, drink wine and beer, and hang out with friends.

This is my go to chili. Easy, savory, delicious .... And it makes people make those noises. You know what I mean. The noises they make right before they realize "holy $hit I can't wait to get more of this in my mouth..."

Oh yes. This is the chili that makes people curse, or stuff their face while cursing......Read on.

It's a simple recipe...just have an hour ready for pre-prep for roasting the chilies. After that, its a simmer and let-alone sort of dish. You don't want to mess with it. Even with the few ingredients involved....trust me. Try it pure. You won't regret it. This recipe highlights the true flavor of chili with pork...a classic, wonderfully simple combo, that is effortless and timeless.

This makes enough for a family of 3, with leftovers to spare - and a few cups to save or freeze. (hmmm...it never makes it to the freezer though....)

What you need
  • 5 pounds or so of peppers (Anaheim, poblano, and pasilla are my favorites. For this, I use about 18 poblano and 13 anaheim)
  • 1 white onion diced
  • 8 - 10 garlic cloves, finely diced
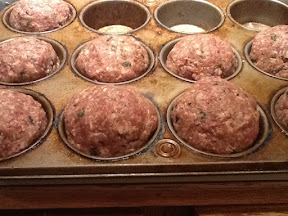
  • 3 pounds pork tenderloin, cubed
  • Salt and pepper to taste
To roast the chilies:

Fill your sink or a large bowl with water. Get those guys in there and bathe them good. Rinse, repeat. Let them sit for a good five minutes as you ponder how awesome this is going to taste, then - Roast them in an oven at 425 on a roasting pan lightly touched with olive oil. But stay away from straight aluminum, it lends to a metal flavor.

You are going to want to watch these guys every 10 minutes or so. If using two pans, the top pan will roast fast - so rotate each pan every 10 minutes or so. Just watch em - You can tell....they get bubbly and the skin breaks away. Flip them to expose new sides that need roasting. They flatten as they roast - it's almost like they beg for it.

If something sticks to the pan...no worries. The stuff that sticks will be just a bit of skin you want off the pepper anyway! I suggest using as many pans as possible...so the peppers don't get crowded. They like their space to do their thing. Two to three pans should be plenty. If you are filling more...whoa. But it'll still be awesome. Room for play, that's my motto.

Assembling the chili:

While the peppers roast, dice the pork tenderloin, then add it and half of the diced onion and garlic to a large bowl. Mix it a bit to incorporate. Show some love by giving a generous sprinkling of salt and pepper, and then....let it sit. The pork likes to pre-funk on the counter, by coming to room temp. Hey, don't judge, we all party in our own ways. This helps it to loosen up and give more flavor and......ok. Need I say more. It's pre-funking.

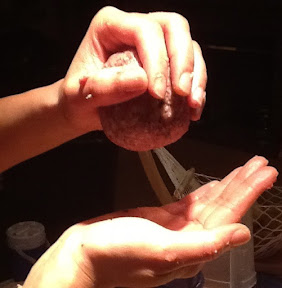
After the peppers are good and soft - blackened and lovely - transfer them to a bowl and cover them. Saran wrap, towel - anything that keeps the heat in and makes a mini sauna...these guys need to steam a bit. This helps the charred skin come off a bit easier. While they sweat it out - start to sweat the rest of the onion and garlic in a large stock pot (or pressure cooker) with a light sautée.

While that's going, prep your peppers by scraping out the seeds and removing the skin and stems. Then dice the peppers, and get ready to make chili. If you don't get all the skin - no worries. Just dice it - and move on. Call it "rustic", and people will say "ooohhhh".

Add the pork and pre-funked garlic/onion party to the now sweating happy onion/garlic stuffs in the pot, and stir gently. After 5 - 10 or so minutes, add all the chilies. Add some water, just so the "party" is covered. Then bring back to a simmer for 40 minutes (at least...if longer, reduce to really low) - or if pressure cooking, bring to pressure and cook for 20. Then you are done! Give a final taste to make sure it's salted and peppered enough...If someone dares to reach for the shaker....Gasp! They should be busy cursing.

Like most recipies with fresh roasted good, this is even better the next day, making it a perfect make-ahead dish. It's great served with a drizzle of Crème fraiche and diced green onion with shredded cheese or....if you can't wait, right out of the pot. I won't judge. Just don't tell anyone I did it too....

Cheers!

Salsa three ways

I love the moment when the spice high kicks in...your eyes glaze over...the world becomes a softer, more gentler place...

I've even been questioned about drinking during lunch after returning from eating 5 star Thai. With a silly grin on my face, and glisten on my brow, I explain that I was merely eating Thai food - which is typically responded to with a knowledgable nod, an "ahhhh...." and a smile.

Those who know me know that my 5 stars is really the universe.

That's what's great about the salsa 3 ways - there's something for everyone, no matter how much spice you crave. We will begin with the "Mother", and a lot of it! The Mother is mild, fresh, and the base salsa. She gets her bite from crisp onion. You can stop there, or use some of the Mother and create the medium salsa - a smokey roasted jalapeño with chipotle. (Don't get scared! We tame them. And you don't have to use as many as I do.) And if you're game, you can then use more of the Mother to make the vinegary, fruity, and wonderfully spicy hot roasted habanero. Oh yeah.....my mouth just started watering.

Now, this recipe will yield about 16 -18 or more cups of salsa, even if you stop at the Mother or decide to make all three. If you make all three you will still have quite a bit of the Mother salsa left - and trust me, it won't be around for long. Try this: make salsa 3 ways and bring it all to a get together. You will leave very, very sad. Why? Because they will eat. It. All.

Let's get to it then! The only special equipment I use is a food processor. But I've also made this by chopping everything by hand. It takes longer, but it gives you more time to dance to some music in the kitchen and sip a beer while you make it. (It's one of the secret ingredients! I actually had someone tell me they could taste the fact that I danced and enjoyed a Corona while making it!)

I do roast the chilies for the mild and hot salsas. You can roast the green chilies for the Mother, too - but I typically use canned - it still comes out fresh and yummy. Another tip: if dicing the chilies in a food processor for the medium and hot, add a bit of the Mother to help get things moving.


For the Mother, you will need:
  • 16 cups tomatoes, diced (if canned, drain)
  • 1 white onion, finely diced
  • 2 1/2 - 3 cups green chilies, diced (or three 7 ounce cans)
  • 1 bunch green onion, diced
  • 1 bunch cilantro, finely chopped
  • 8 cloves of garlic, finely chopped
  • Lime juice to taste
  • Salt and pepper to taste
All you do: combine the above in a big bowl. Taste - adjust salt and pepper if necessary. You will notice, if she is made and then served fresh, she will have a bit of water - this tightens up if she is allowed to sit overnight. But waiting isn't necessary!


To roast the peppers for the next two, sprinkle them with olive oil, chili powder and garlic powder. Roast in a shallow pan in the oven at 375. Check them after 10 minutes - maybe turn them as they blacken. Once they are good and roasted, they are ready to join in on the fun.

For the smokey chipotle jalapeño medium, mix together:.

  • 2 1/2 cups of the Mother
  • 3 jalapeños roasted, finely diced, tops removed (the flavor will mellow if left overnight after preparing. To further mellow the flavor, slice them open and remove the seeds by gently scraping)
  • 3 tsp. chipotle seasoning
  • Lime juice to taste (even though the Mother has lime, a little more acid helps round out the smokey flavor)
  • Salt and pepper to taste
For the habanero hot, mix together:
  • 7 roasted habaneros - seeds and all, tops removed, finely diced
  • 1 1/2 cups of the Mother
  • 2 tbs. rice wine vinegar
  • Lime juice to taste
  • Salt and pepper to taste
The flavor will knock your socks off. Habanero has a great slightly fruity and flavorful spice to it.
For a quick guacamole, I mix lightly cubed avocado with one or a combo of the above salsas, and a couple dollops of plain yogurt or mayo (the olive oil one is awesome) with extra lime juice and salt thrown in.

Until next time! May the spice force be with you.....

Wednesday, January 11, 2012

Food for thought: Skillet vs. Sauté pan


Did you know that there's actually a difference between the sauté pan and the skillet?

The skillet has sides that flare out, while the sauté pan has sides that are straight. This gives the sauté pan more surface area. The skillet, however, is actually better for sauté than the sauté pan due to the sloping sides.

I'm a food nerd, and find this fascinating. Check out some more nerdy facts about these pans on Serious Eats.

Zucchini with egg


You know this dish is good, because it's one my Mom would make it for me. (Hi Mom!)

Whenever I eat it, I can't help but make those "mmmm yummy" noises.


Try it.
I bet you make those noises too.
Yes, and it even counts if you make them in your head where no one can hear.

It's a delicious, healthy vegetarian dish (for those who eat eggs), packed with protein and flavor. At four ingredients, it's a great dish to have in your culinary arsenal when you need a quick side or main meal.

It's the trifecta! Fast, yummy and healthy!

All you need:
  • Zucchini
  • 1/2 of a white onion (per zucchini)
  • 2 minced garlic cloves (per zucchini)
  • 1 egg (per zucchini)
  • Olive oil
  • Salt and pepper

Slice the zucchini in half, then slice each half into half moons.

Slice onion in half, then into strips.

Heat a large sauté pan to a little above medium. Get the onions and garlic working, and sauté for a couple of minutes, or when the onions just start to become translucent. Then add the zucchini. Sauté for a couple more minutes, or until zucchini just start to lose their firmness. Add salt and pepper to taste.

Whisk the eggs in a separate bowl - they need to get ready to join in on the fun. (They like to pre-funk a little bit and hang out on the counter til they get to room temperature.)

Push the cooking zucchini party to one side of your pan, add a little more oil if needed, and scramble the eggs in the newly created space. Once the eggs get to a soft scramble, begin mixing everything together and reduce heat.

Plate, serve, enjoy!

Theres something magical that happens when these foods play together. It's somewhat creamy and decadent. (I am so making those mmmm yummy noises in my head...right...now. I'm on the bus. People are staring.)

Tuesday, January 10, 2012

Gluten free meatloaf muffins with blood orange balsamic ketchup

Nothing says lovin' like a muffin made outta meat. Ok, they are more like large meatballs - but the trick is the cooking vessel: a standard muffin tin. No more hour plus waits for meatloaf!

For my recipe I use 2 pounds of grass-fed beef. This yields about 12 or more large muffins. Hey, I like leftovers!

To the beef, I add:
  • 2 eggs (I have to give a shutout to The Good Eats Gal, my next door neighbor. In the middle of making these I discovered I had no eggs....FAIL. She graciously lent them to me. Don't you love neighborly neighbors!)
  • A generous amount of chopped garlic and 1 small finely diced or shredded purple onion (If shredding, raw is best. If chopped, a quick sauté with the garlic til caramelized is a great way to add flavor.)
  • 1 bunch of fresh basil (finely shredded)
  • A couple pinches of dried thyme
  • A palm of that awesome Spanish oregano I mentioned in ratatouille with spinach
  • 2 tablespoons of coconut flour to help it bind
  • 2 tablespoons milk (cut this to 1 if you are using shredded raw onion, as it lends moisture)
  • A few shakes of pepper flakes to taste
  • Kosher salt and black pepper to taste
  • A heaping quarter cup fresh shredded cheese - I used Romano and Parmesan.
Now comes the fun part - use those utensils at the end of your arms, dig in, and mix well! To form the muffins, I grab a palmful of meat and cradle in my right hand. Then I use my left hand to "lift and turn" quickly to lightly form into a ball. We are aiming for a size just under the actual size of a cooked real muffin.
Now they are ready to be muffinized. Place them in the tin, and place the tin on a cookie sheet. They will give off enough love to not stick, and if there's too much love - the cookie sheet will keep the love from getting the oven all messy.
Bake these guys at 375 for 20 minutes and let everyone know dinner's on in half an hour.

Now for the sauce! To make our own sugar free healthy ketchup, we'll start with a can of tomato paste, some salt, powdered mustard, and blood orange balsamic. Regular balsamic would also work great here - or you could make your own flavored citrus balsamic by simmering some balsamic lightly and adding your citrus of choice. The balsamic will add just the right hint of sweetness, which helps curb the acidity of the tomato paste.

Start by drizzling the balsamic into the paste and a sprinkling of mustard. Mix, taste, add salt, adjust....until you have it just how you want it. Once the muffins reach the 20 minute mark, smear some ketchup on them and pop them back in the oven for 5 minutes more.

Let them rest for 5 minutes before serving, they worked hard and deserve a little break. Use a fork to remove them from the pan by gently "carving" around the exterior of each muffin (to release the sides from the pan) and lifting out. (There will be some juice and fat accumulated in the bottom of the cup. The fork helps to remove the muffin from its juicy bath.)

And then the fun part. Eating!

Served with ratatouille with spinach and roasted winter squash purée topped with black lava salt.

I need better lighting in the kitchen. I will work on that....

Until next time!

Crème fraîche

You are going to kick yourself this is so easy.
  • Get a jar.
  • Add 1 cup of whole cream. (And trust me, not "low fat")
  • Add a tablespoon of buttermilk. (Again, not low fat. We aren't drinking the stuff, so go "all in".)
  • Shake.
  • Let sit on counter for 24 hours. (I know, it's weird. But it'll be ok. Plus, don't you love an element of danger in your life?)
  • Open, stir, and tell people how fancy you are because you make your own crème fraiche. (Then you can refrigerate. It'll keep for two weeks! If it lasts that long....)


What can you do with it? What can't you do with it!
Try adding to a brown sauce to make it sexy. Or, drizzle on soups for a creamy garnish. Would you put sour cream in it? Try adding the crème. It's tangier, a little softer, and a fun way to play with your food.
Cheers!

Roasted winter squash purée

This is a great alternative to mashed potatoes or a starchy side. It's a pretty intuitive dish, simple, and easy to experiment with. Woo hoo! Playing with food! You know I love it. *grins wildly*

This makes the dish an excellent repurposed leftover food. Yes. Waste not want not! I start with a good sized winter squash (thick skinned like an acorn or butternut), and cut into quarters. I brush just a bit of olive oil on it, nothing else (it'll get the love later), to help encourage caramelization.

I roast it at high temp of 425 to really coax out those toasted savory flavors. Once the flesh is soft when pricked with a fork, and the tips are a little toasted, I pull out the squash to cool.

Time to get naked! The squash, that is. Well, you can too. I won't judge. Turn the squash flesh side down in a bowl. This makes the skin super easy to remove.

Next it's time to mash, add a little salt, pepper and butter to taste. Wasn't that easy?


With this base, you can upgrade fresh or from leftovers by adding:
  • Cinnamon, brown sugar and cardamom
  • Goat cheese, parsley and garlic
  • Ham, caramelized shallots and fresh thyme
  • Topping of bacon crumbles, crème fraiche, and scallions
The list could go on and on....

Enjoy!

Ratatouille with spinach

This dish screams comfort to me. It's fast, healthy, and most importantly, delicious. Most ratatouille uses eggplant, summer squash (zucchini or thin skinned squash), onion, and root veg. For this recipe, I subbed out the squash for spinach because.....well, I didn't have squash. But hey! That's the great thing about cooking. Improv! Play! Experiment! Who makes the rules? You do. The one with the knife! Ok. Sorry. I got carried away.

I have some tips when it comes to that wonderfully bulbous purple veg: the eggplant. The skin (or more exactly, right under the skin) holds a little bit of bitterness. Some like it, some don't. If you are in the "don't" category, peeling the eggplant will mellow it out. Slice the eggplant into rounds before cooking, sprinkle with salt, and lay them in a single layer on a cookie sheet for a half hour to an hour prior to prepping (dicing). This also mellows out bitter favors, and helps to leech out some of the moisture so your end product is firm and not mushy. Who wants naked mushy eggplant? Not me. If you are crunched for time, microwaving also helps leech out some moisture. Microwave for 5 minutes, let sit to cool, then pat with paper towels. Voila! Eggplant that is prime time and ready to party.


In my recipe I used:
  • 1 eggplant
  • 1 bunch of spinach
  • 1 parsnip
  • 1 carrot
  • 3 roma tomatos
  • 1 bell pepper
  • 4 garlic cloves
  • Kosher salt, black pepper and dried oregano. (A little secret - the mexican food aisle of the grocery store, where all the little cellophane bags of herbs are? Dried oregano there is amaizing. The leaves are whole little round things of oregano loveliness. So fresh tasting, and at 65 cents a bag, it's a steal.)
Veg gets chopped into similar sized chunks and garlic gets a dice.
Get your hard veggies into a pan (onions, carrots, parsnips) heated to medium with some olive oil or ghee. Sautée them til they start to give up a little love, and caramelize a bit.
Then add the rest of the goodies, all except the tomato. You can add some butter and a splash of white wine for extra flavor. Go for a dry wine like Pinot Gris or Pinot Grigio - it will add a nice hint of acidity and brightness. Stay away from oaky heavy Chardonnay. Eggplant loves to absorb the flavors it's cooked with!

Season with oregano, salt and pepper, and sautée for about 3 - 5 minutes, or until cooked to your liking. Not too long or the eggplant will get mushy. Just keep an eye on the eggplant and use that to gauge how long your sauté should be. And taste it!

Add tomato and go 2 - 5 minutes more. You can stop here, or...if you have a stove to oven pan, drizzle a bit of olive oil on top and fresh grated parmesan and broil for just a couple of minutes. Broiling will make the tomatoes cry mercy, and adds a great roasted flavor to the dish. A flavored oil such as lemon tarragon works good for this step. Or any flavor oil you wish. You have the knife, remember?

Cheers!

Sunday, January 8, 2012

Homemade stock - quick version

Homemade stock is the best. You can control the salt content, ingredients, richness...and it's a handy way to use all of your "scraps"' so nothing goes to waste. Whenever I chop veggies, I keep the good scraps in a big plastic bag in the freezer. Mushrooms on the edge, green onion ends, carrot tops, beet tops...fresh herbs that are just about to give up before I have time to use them - it all goes in there.


I throw this all in my pressure cooker with a bouquet garni (I use what's on hand: usually kosher salt, garlic, bay leaf, thyme, & peppercorn) and some water (til the veg is submerged). For extra oomph I'll sometimes add some stock I have already prepared.


After it comes to pressure, I usually cook it for 20 minutes. If cooking in a traditional pot, I try to simmer for up to 6 hours or so, or less - depending on how the flavor has developed and how much I'm making. After it's given all it can give, the stock gets strained and portioned out into 1 cup and 2 cup portions and frozen. Super easy! It's nice also to reserve a couple of cups and reduce it down even further, til it reduces by half or more - and freeze into ice cubes (then store in a baggy or the like). It makes for a quick and easy demiglace icecube that you can use to make a pansauce, punch up a soup base - eat as a snack...(kidding. Go for it though, it's healthy!) The veggie broth makes for a good base to start a quick meat broth as well. Nothing is better than a soup or risotto made from homemade stock! In cooking school, we will go over the long "proper" method later. Enjoy!

Saturday, January 7, 2012

Cooking School: Cooking gear and stuff

I know. We all have our gear. Ready to go. But this is the first course. So here we go.

Food for thought: Ingredients

The fresher the better.

After a failed attempt at gardening in soil that's not meant to be gardened in, I had a huge hole in my culinary heart. Most organic produce is expensive, hard to find in variety (can you tell I like variety yet?), and sold under a guise. Through a friend at work I found Full Circle. A home delivery service that brings locally Grown or produced organic goods right to your door. They not only grow their own produce but they reach out to other local farmers for a farm to table program that's just..amaizing.

My first delivery sent me into shock. I'm used to the hefty 5 pound bag of potato that I get for $2 or so. As part of my delivery, I got a little sack of beautiful fingerlings. What...? But after cooking only half the sock, That made a meal easily and then some, I discovered I bought too much previously...and bought poorly. Not only was the sock enough to feed us for a couple of meals, it was local, and supporting our community. My previous Extra Large 5 pound purchase was not only mass produced, but would sometimes go to waste.

It opened my eyes. Quality isn't that hard to find, but recognizing it is harder. Our bigger better culture has taught us to "find the deal". What's it worth?

Cooking School: Class is in session!

Ok, so who wants to play? I wanted to share one of my favorite books - where I go to "school", so to speak. The Fundamental Techniques of Classic Cuisine - from the French Culinary Institute.

The book overviews both the 6 and 9 month courses taught at the institute. It's a course book, and schools you on skills like the measurement and terminology of a proper brunoise cut, to preparing lamb shanks, pâté, stock.....it's the next best thing (I could afford) than attending an actual culinary institute. Plus - I can go at my own pace. (it's freaking HUGE by the way. I actually lugged this on the bus for a while. That lasted a week.)


I've been teaching my way through the book, slowly - but have just been "playing" and not learning so much as of late. My hope is that blogging about it will help give me the motivation to stick to my homework. I have created "assignments", and have even graded myself....meaning, yes. Gotta do it again til it's right. So far the toughest part is just getting my measurements and tournage (vegetable shaping) correct. Carrots that should look like smooth long footballs look like .... Well, butchered footballs after I'm done.

I will tag this as "cooking school" for anyone who wants to join in. We will start at the beginning - and hopefully end at the end. Cheers!

Food for thought: We need to get to the butcher...stat!

So here it is, only early January and our meat supply has dwindled to a wild salmon fillet, some sturgeon and some ground grass-fed beef. It's been challenging for me to come up with creative ways to mix things up.


We are so fortunate to be able to catch our own wild food, and I'm grateful, thankful and - ok, and a little spoiled ;) but....I'm dying for some new meat to play with. While I die, I have been trying to get creative.
The last sturgeon recipe was a total experiment - I tried cooking "poor mans lobster". The method is simple: cut sturgeon into 1 inch cubes, then boil in 7up and serve with a seasoned melted butter. (a side note: part of my love of cooking involves the sourcing and the prep. It's not too satisfying to hunt 7up and prep it. Trust me. I tried making it interesting by dancing barefoot and sipping brandy while listening to The Killers. It helped a little.)
Since it was my first time making poor mans lobster, I didn't want to mess with the "recipe" (found online). And let's face it - due to the simple yet processed main braising liquid, the dish would either be horrible or amazing. Well - after trying it out, we actually liked it! Its definitely a try again dish. Because I like to play, and don't want to make cooking our food in soda a habit, I could see swapping the soda out for a salted water sweetened with agave or raw sugar. That could possibly turn it into a favorite.
Here's a pic of the plate: I served it up with a cauliflower mash with salted black truffle and a little Italian dish of sautéed zucchini, egg garlic and mushroom. Now....thinking of lunch.....


Friday, January 6, 2012

Food for thought: My first post

I'm not a blogger. I am also not a foodie; there are so many things I have not tried. I'm also not a chef; I would probably make one cringe at my poor skills "a tournage".

But here I am. Blogging. And you know what - I am looking forward to a lifetime of discovering new things. And you know what else -  put it in front of me and I will cook it. Not only will I cook it, I will make "it" be the best "it" and have the most "itness" as possible. Well, I try. Trust me - I have my off days. (And some very VERY off days.)

So that's it in a nutshell. I love food. I love cooking. I love sharing food. It's the one gift you can give someone that they take inside of themselves and forever becomes a part of them. (I try to remind myself of this when my family wolfs down my deer dressed with "sauce vennison", that took 1 hour just to deglaze, in 10 minutes without so much a grunt or eyeroll.)

It's worth it. This is my way of sharing that gift with those who can't fit around my table, or dance in the kitchen with me.